
Echoes of the Past: The Kingdom of Despair: Chapter One: The Queen
Trust our Echoes of the Past: The Kingdom of Despair Walkthrough to help you fight your way through this dark kingdom as you search for a way to reverse the evil the witch has brought upon the land. Our detailed instructions, custom screenshots, and simple puzzle solutions are waiting to help you find the hidden amulets, defeat the witch, and return safely to your home world.
General Information & Tips
Chapter One: The Queen
Chapter Two: The Knight
Chapter Three: The Artist
Chapter Four: The Scientist
Chapter Five: The Girl
Ask for help in the comments below!
Chapter One: The Queen
Chapter Two: The Knight
Chapter Three: The Artist
Chapter Four: The Scientist
Chapter Five: The Girl
Ask for help in the comments below!
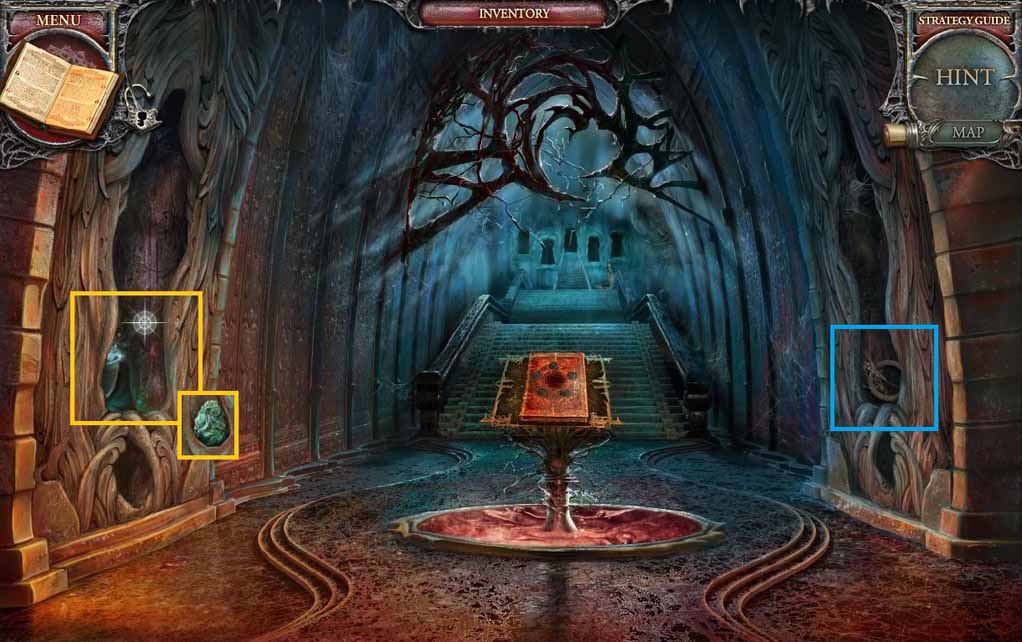
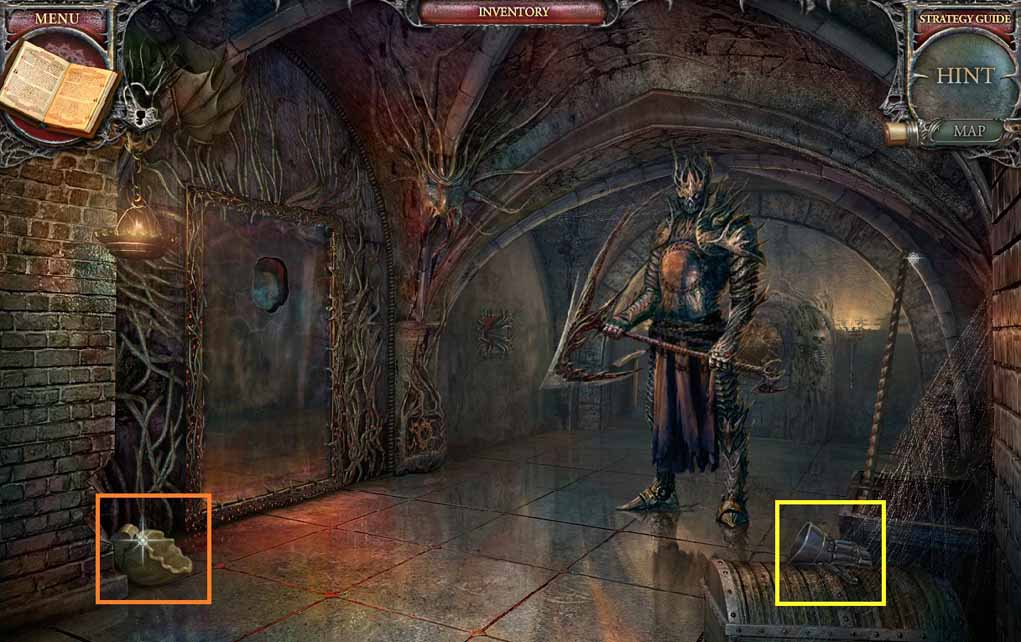
- Collect the ring.
- Examine the alcove; collect the hard stone.
- Move ahead to the stairs.
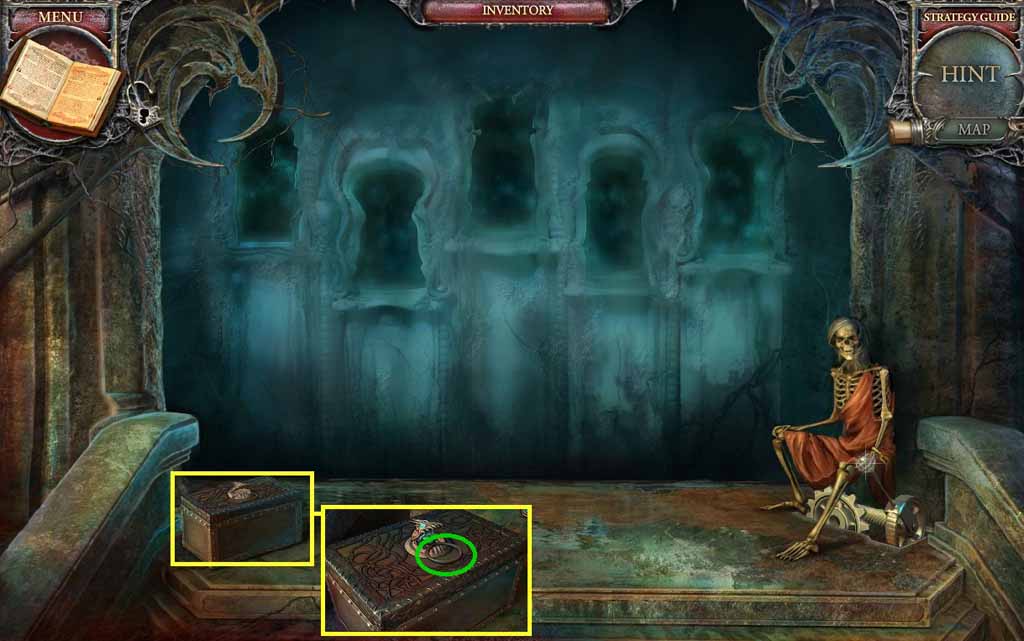
- Examine the chest; insert the hard stone into the mouth.
- Collect the 2nd ring.
- Move down once.
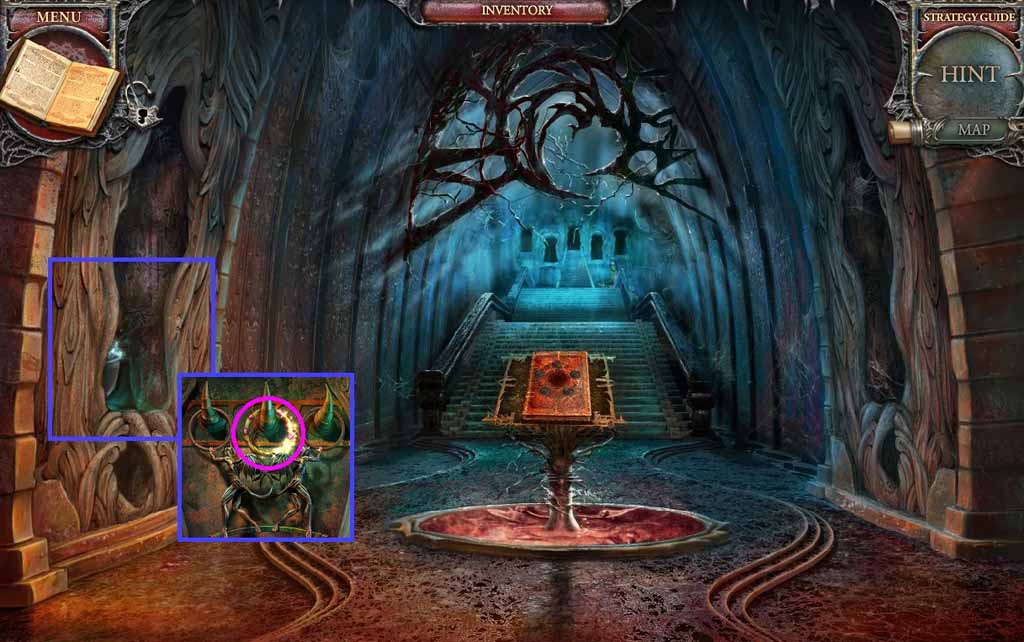
- Examine the alcove.
- Place the rings onto the hooks; collect the bracelet.
- Move ahead.
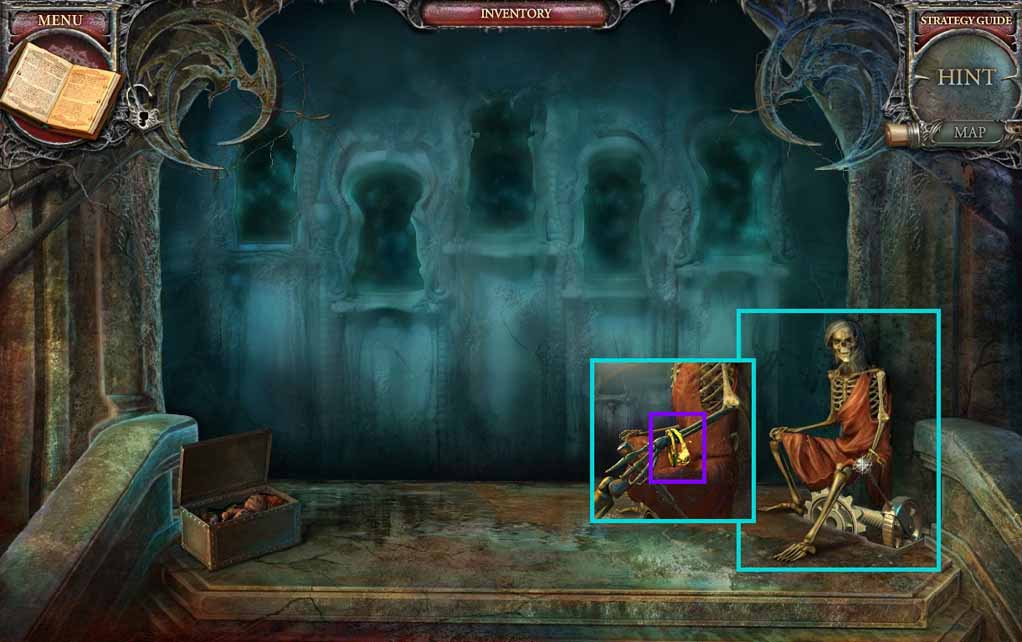
- Examine the skeleton.
- Give the skeleton the bracelet.
- Move up the stairs.
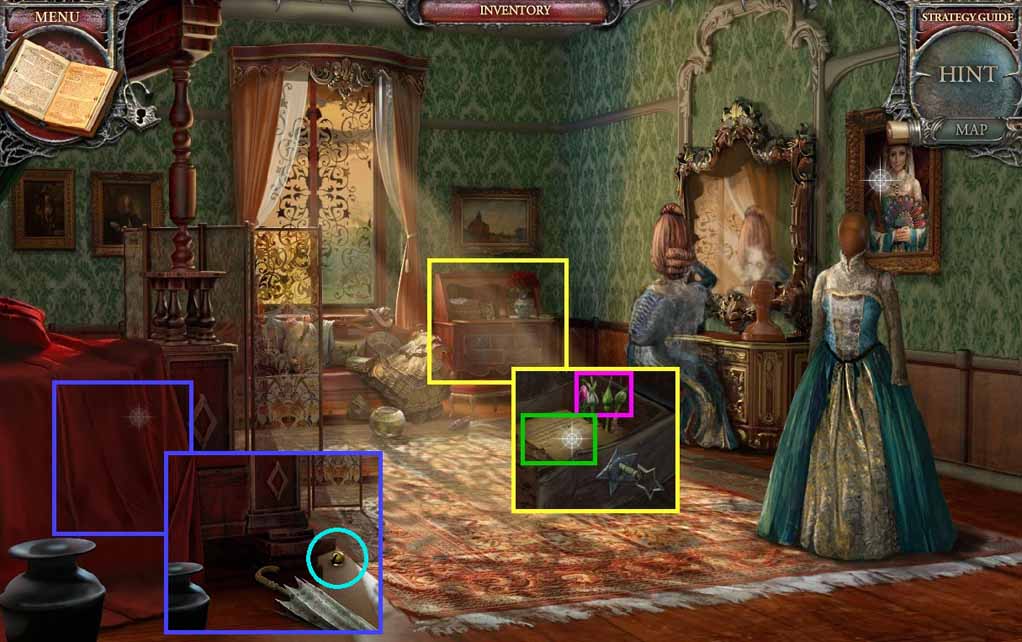
- Collect the razor.
- Move down once.

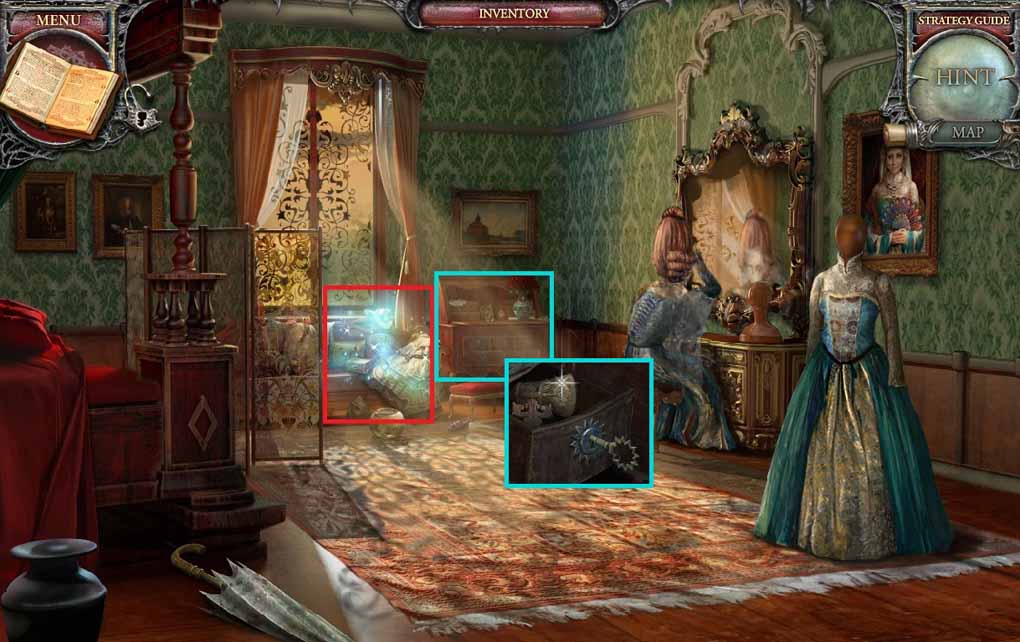
- Examine the chest.
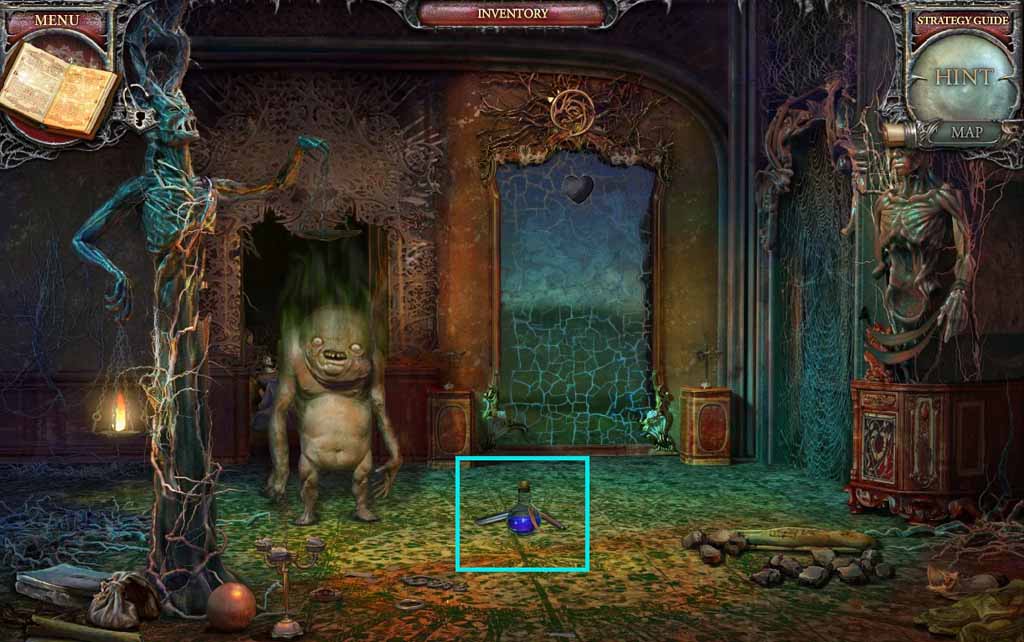
- Select the razor and use it to slice the doll open; collect the mirror shard.
- Move up the stairs.
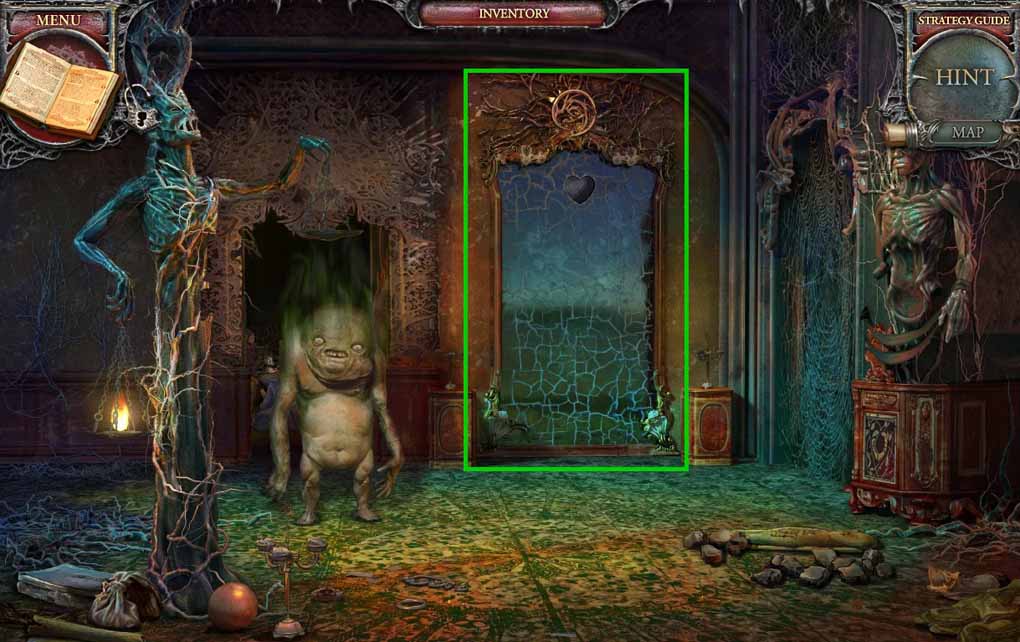
- Examine the mirror and insert the mirror shard.
- Move ahead to the Drawing Room.
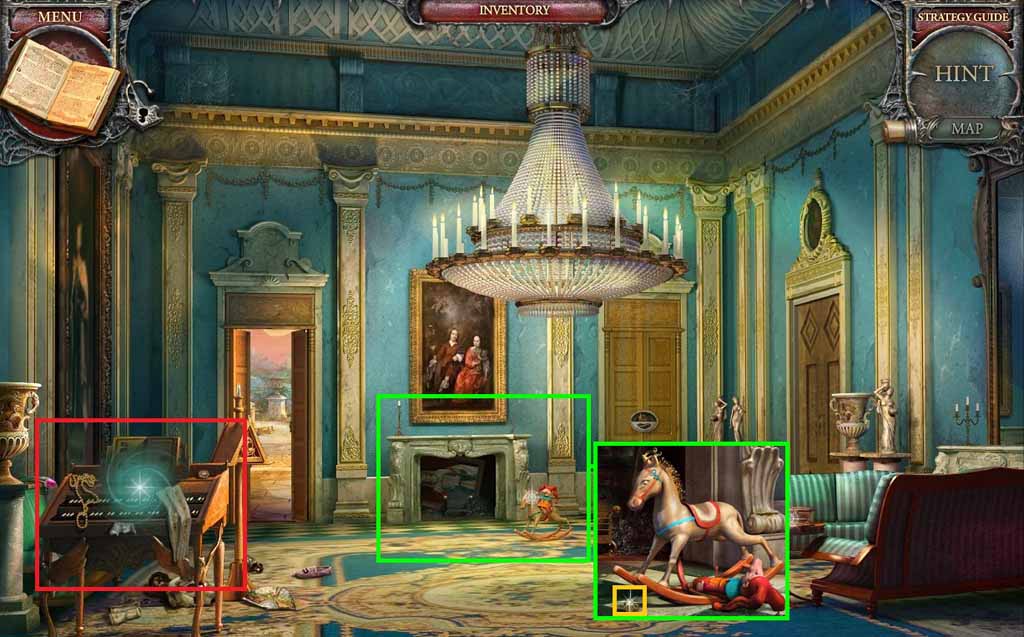
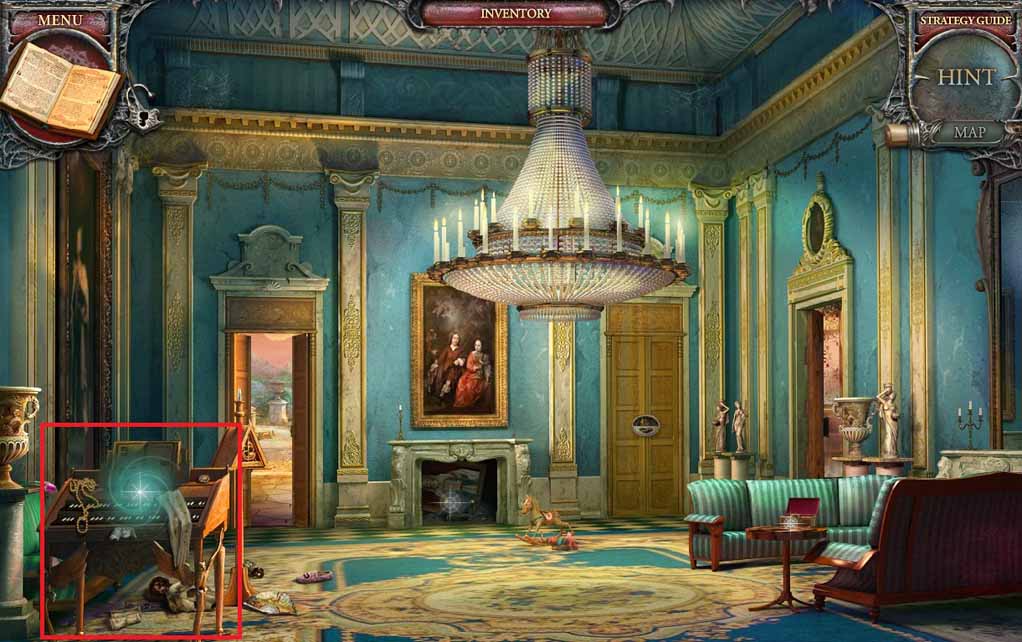
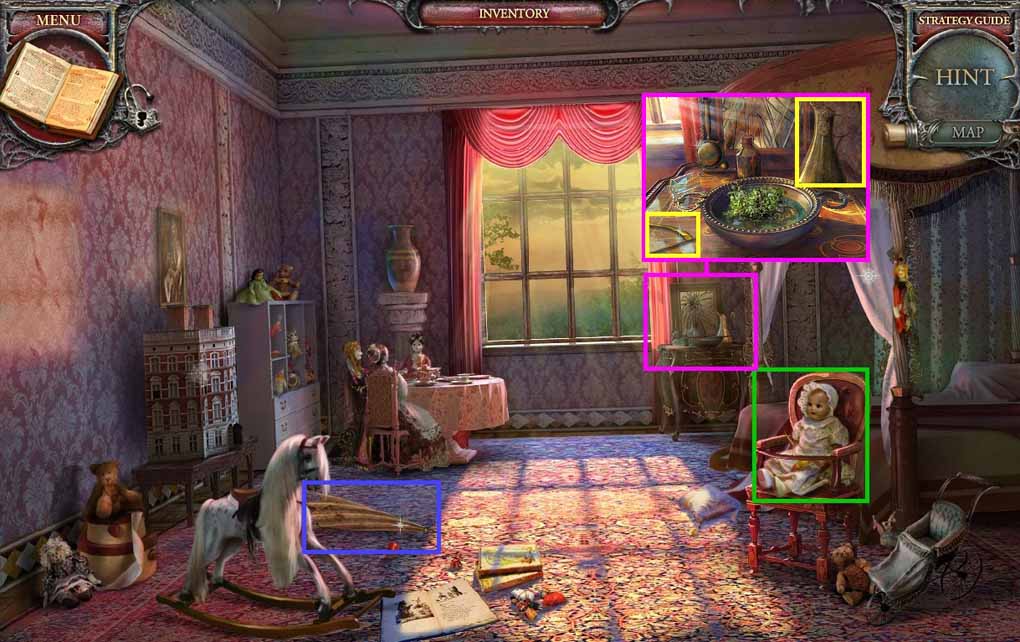
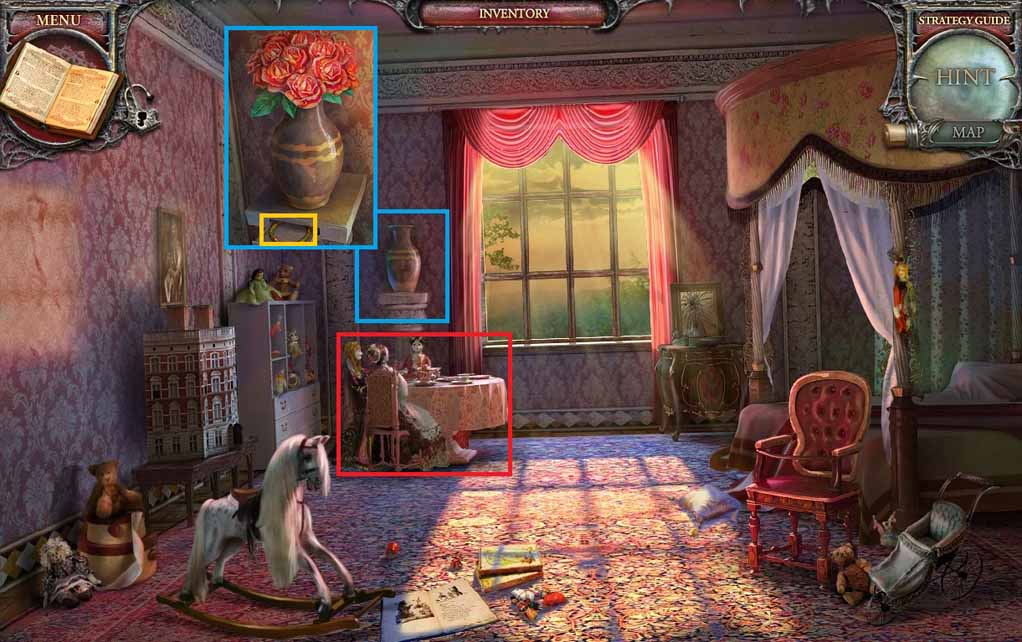
- Examine the fireplace.
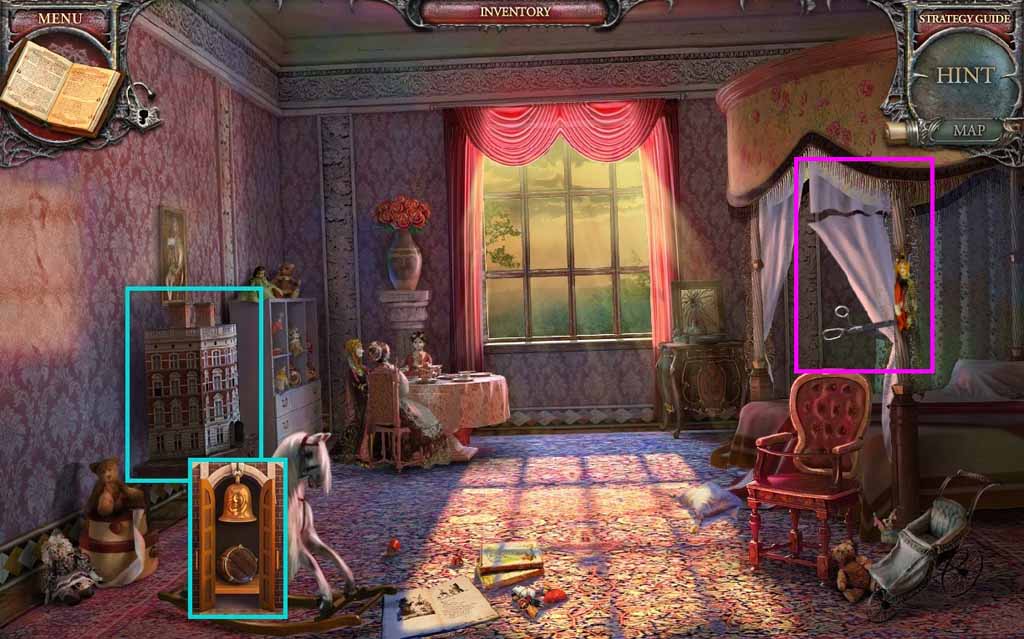
- Click the rocking horse; collect the rattle part.
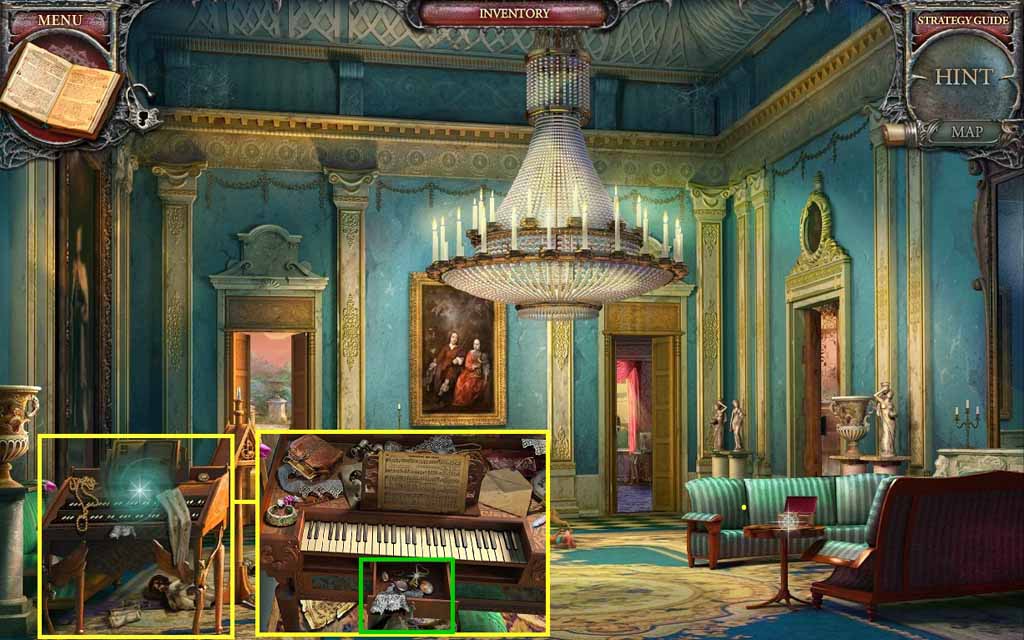
- Click the piano to access a hidden objects area.
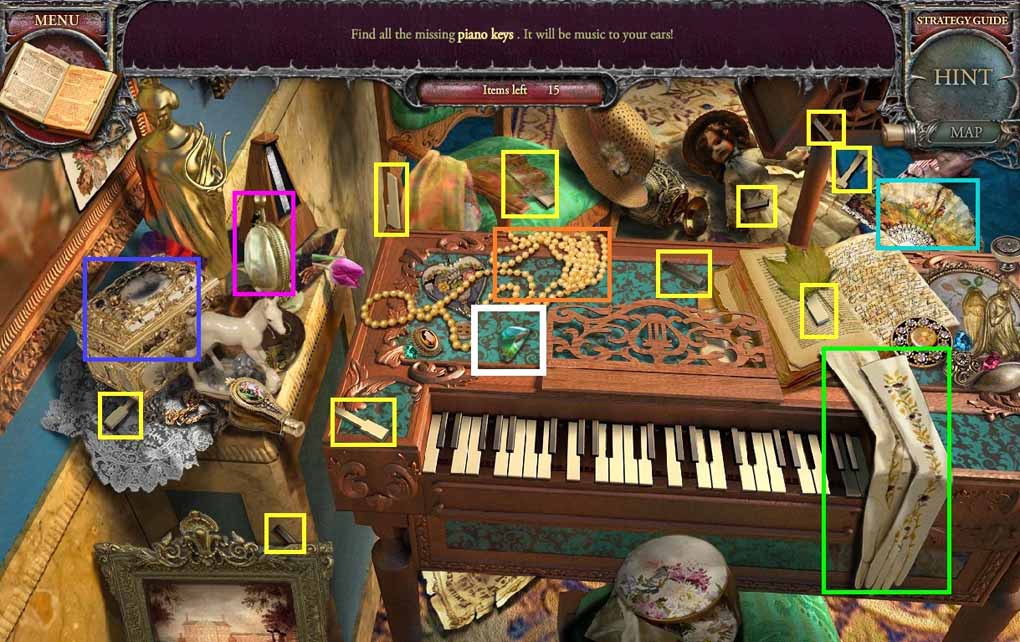
- Find the piano keys.
- Click the fan; collect a key.
- Click the gloves; collect a key.
- Click the trinket; collect a key.
- Click the jewelry box; collect a key.
- Click the pearls; collect a key.
- Collect the lock part.
- Move ahead to the Porch.
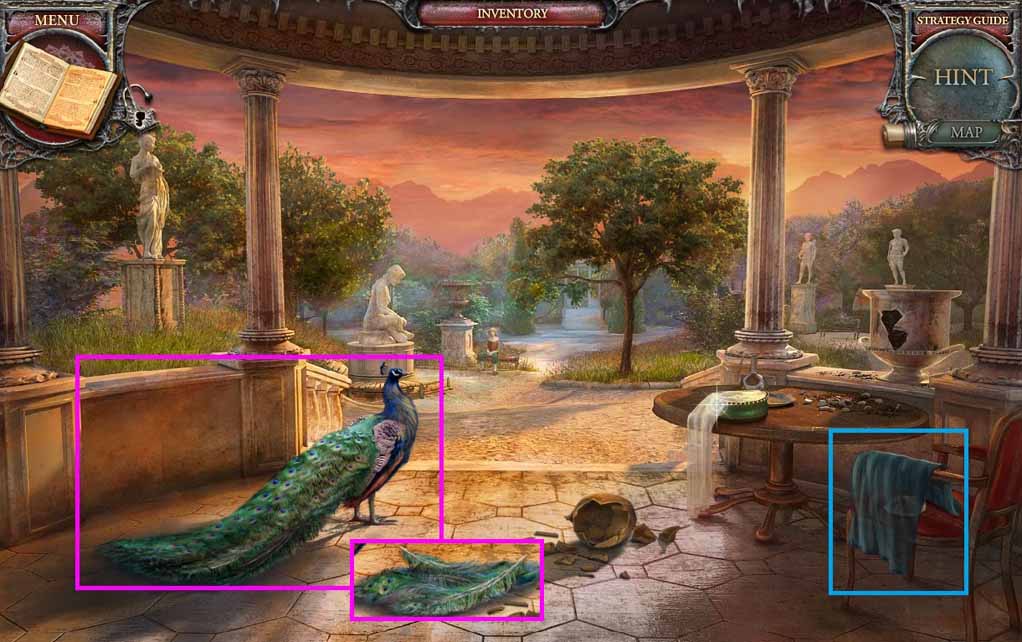
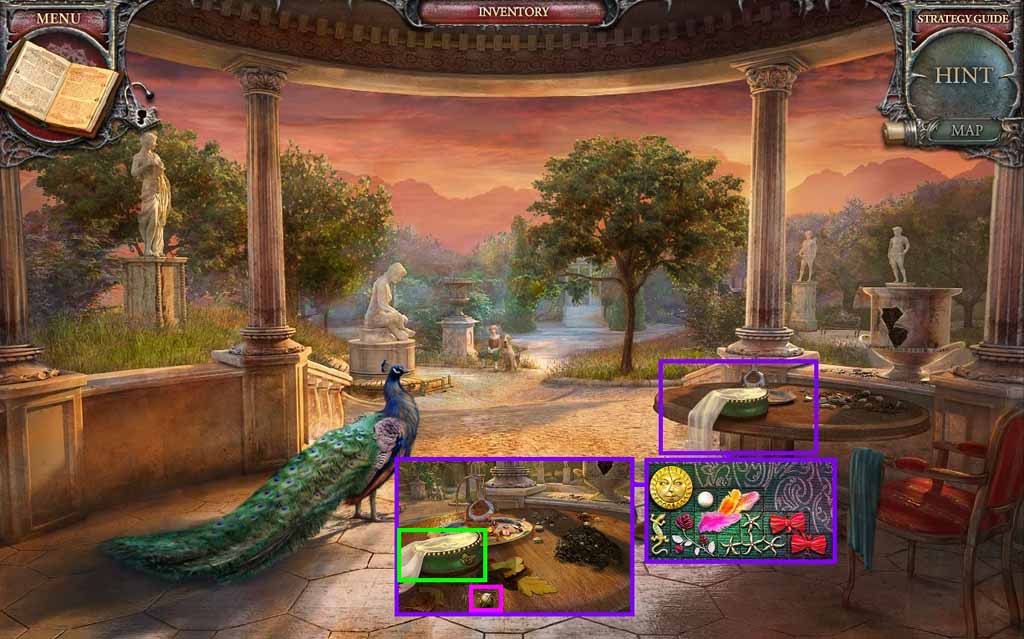
- Click the cloth; collect the landscape part.
- Click the peacock; collect the feathers.
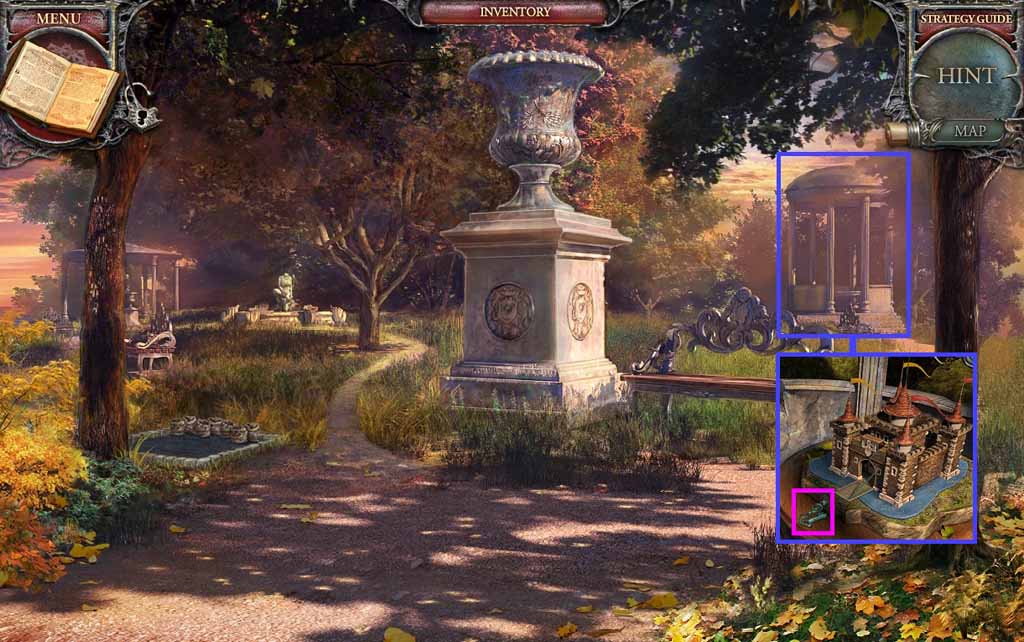
- Move ahead to the Garden.
- Examine the gazebo; collect the lock part.
- Move to the Drawing Room.
- Examine the table; insert the 2 lock parts into the jeweled box.
- Collect the pins.
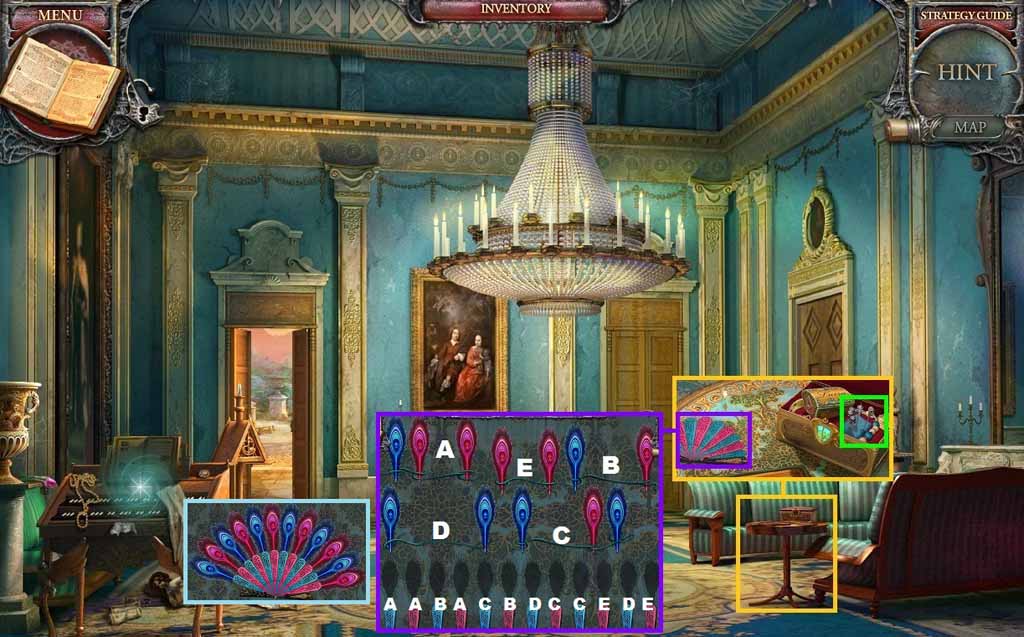
- Click the fan to access a mini-game.
- Insert the feathers into the fan to trigger the mini-game.
- Move the feather groups to the bottom into their matching color bases.
- Collect the feathers in order so that each feather fits onto the leftmost base to solve the game.
- Collect the fan.
- Move down once.
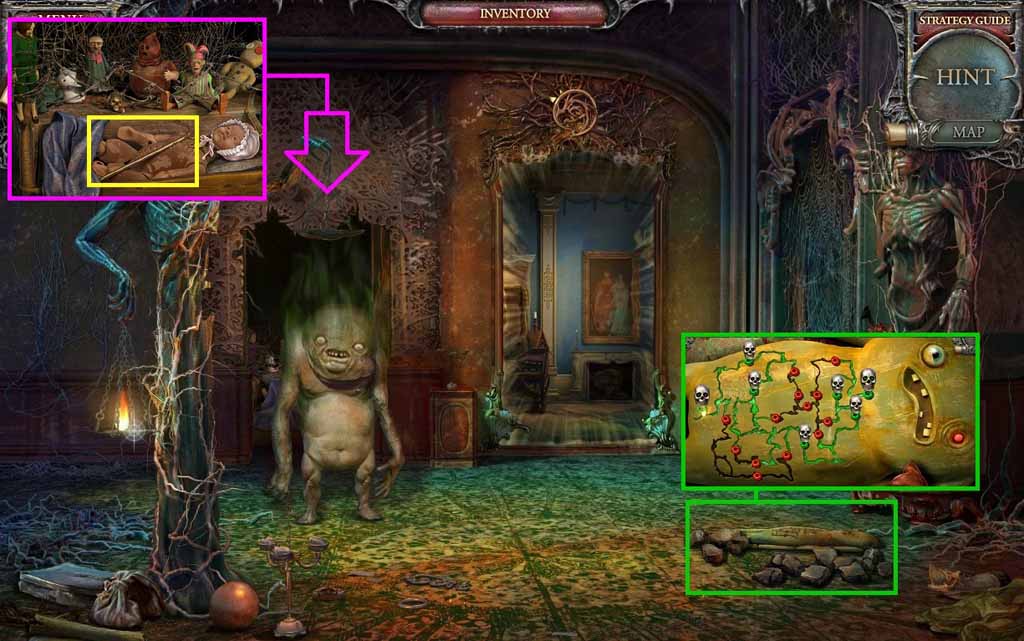
- Examine the voodoo doll and insert the pins into it to trigger a mini-game.
- Solve the game by placing the pins correctly to move the energy from left to right.
- Zoom into the bedroom; click the blanket and collect the crowbar.
- Move to the Garden.
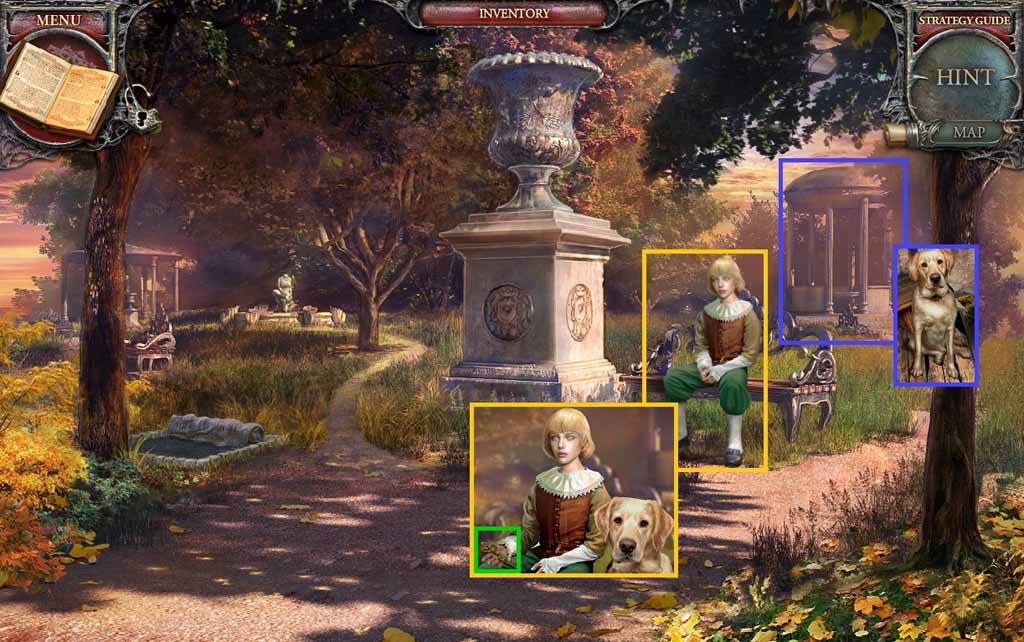
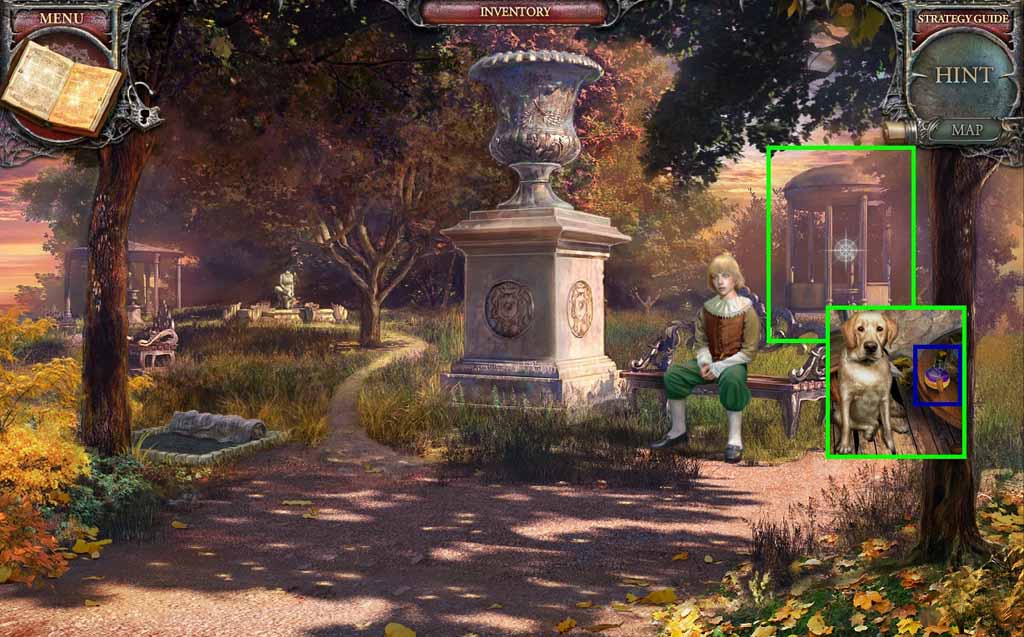
- Examine the gazebo.
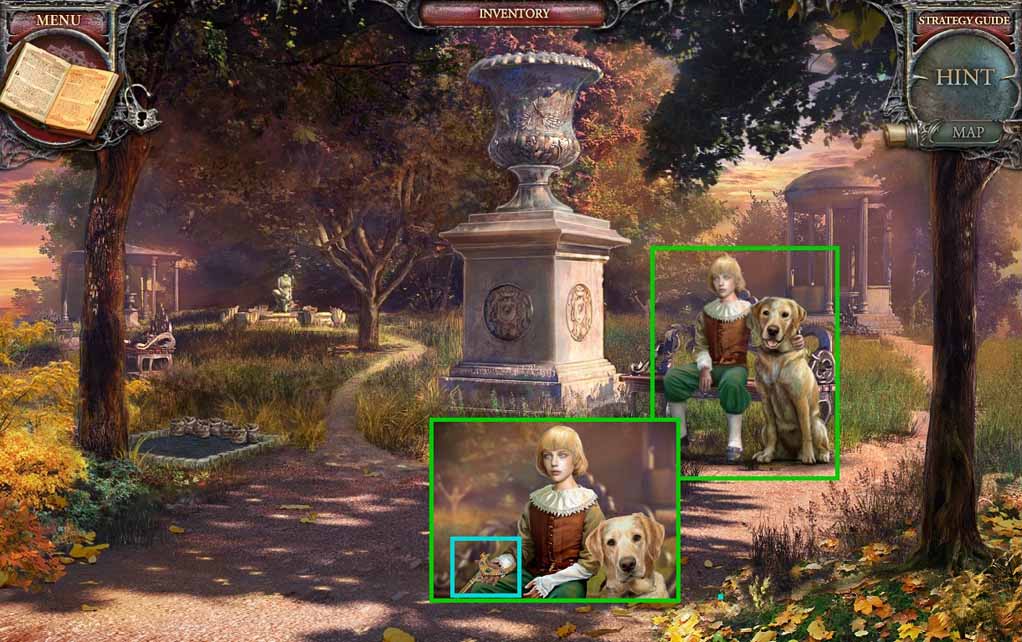
- Select the crowbar to free the dog’s paw; collect the dog.
- Give the boy the dog; collect the boudoir key.
- Move to the Drawing Room.
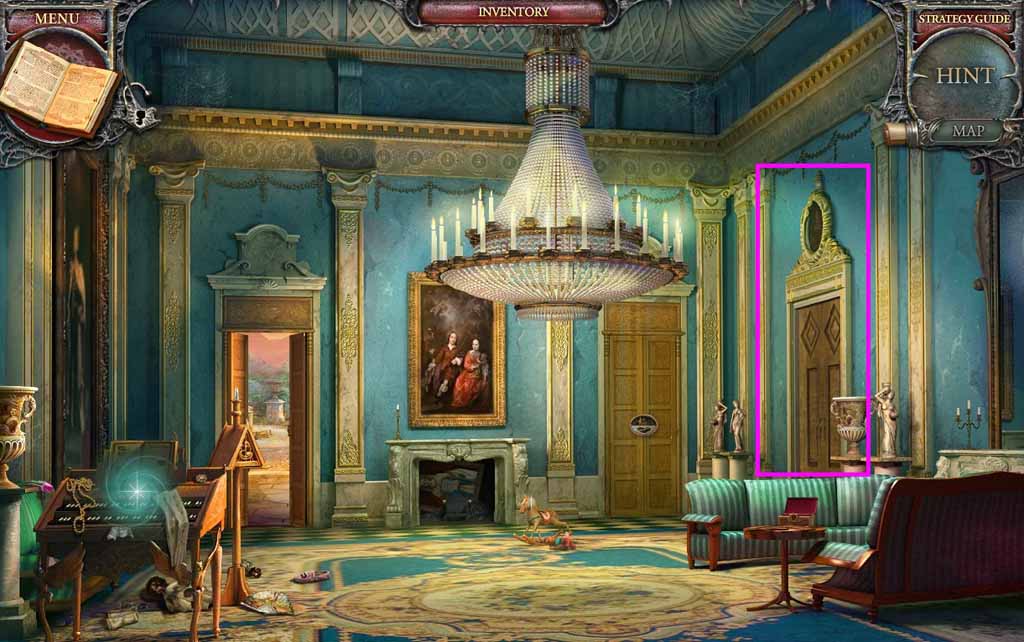
- Examine the door and insert the boudoir key.
- Enter the Boudoir.
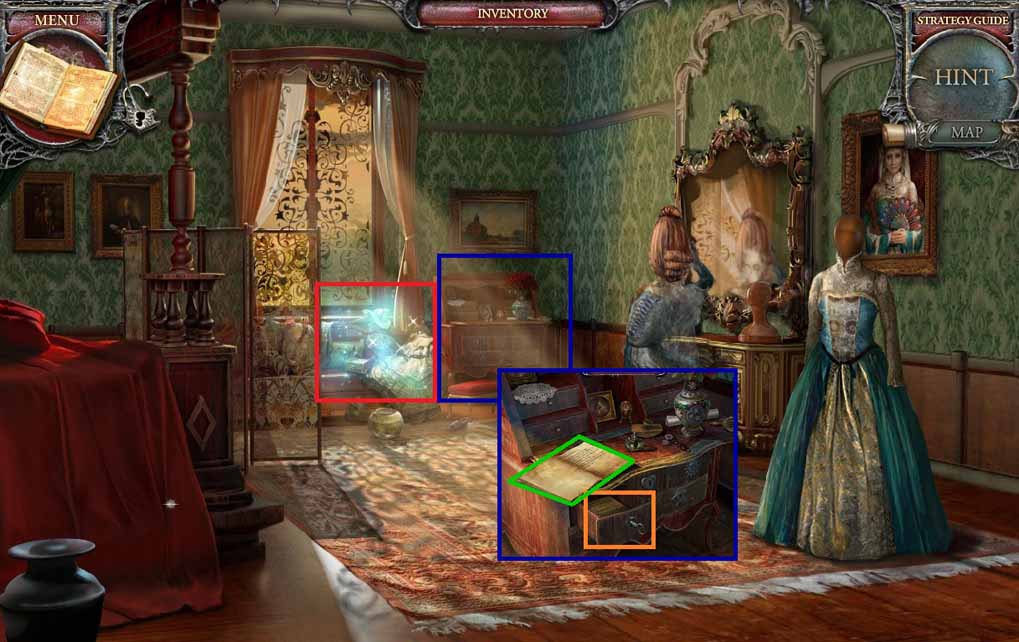
- Zoom into the desk; click the notebook.
- Read the note.
- Click the drawer and click the items aside; collect the music sheet.
- Click the hidden objects area.
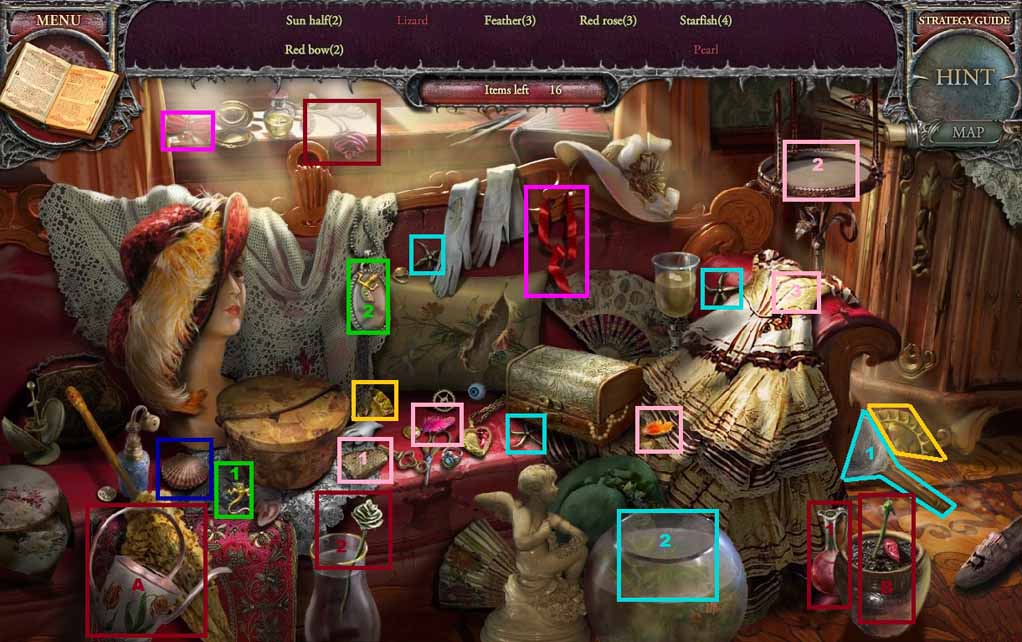
- Find the listed items.
- Click the red ribbon; collect the red bow.
- Select the net and dip it into the fish bowl; collect the starfish.
- Click the clam shell; collect the pearl.
- Select the red liquid and pour it into the vase; collect the red rose.
- Select the water jug and water the plant; collect the red rose.
- Select the cracker and place it onto the bird feeder; collect the feather.
- Collect the hat decorations.
- Move down once.
- Zoom into the piano; place the music sheet onto the reader.
- Click the candle to trigger a hidden objects area.
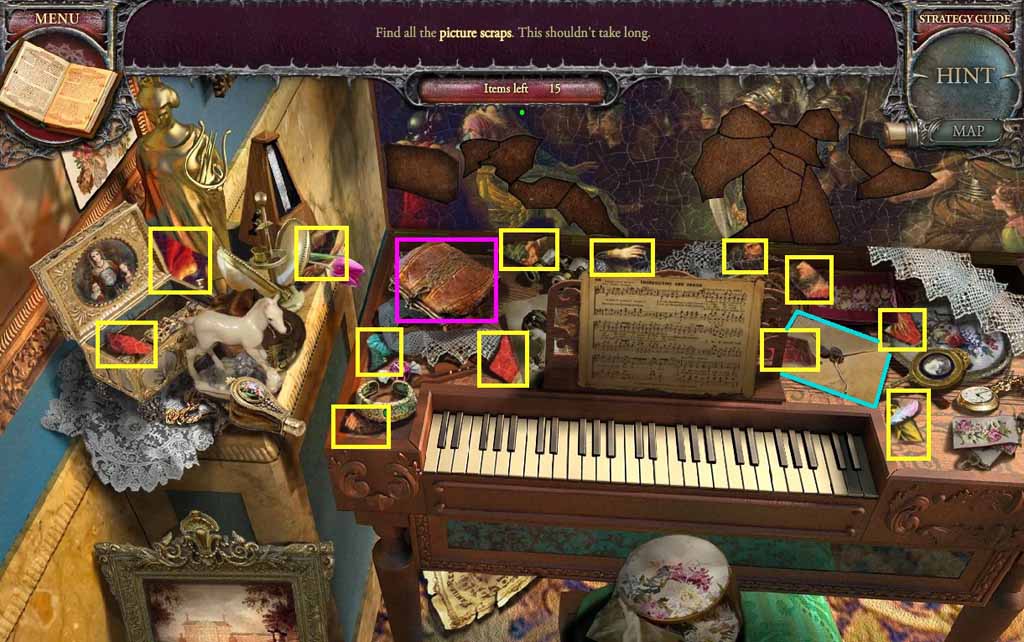
- Locate the picture scraps.
- Click the coin purse; collect the picture scrap.
- Click the envelope; collect the picture scrap.
- Move to the Porch.
- Examine the table.
- Place the hat decoration onto the hat to trigger a mini-game.
- Solve the game by placing all the items onto the grid making sure that they do not overlap.
- Collect the hat and collect another rattle part.
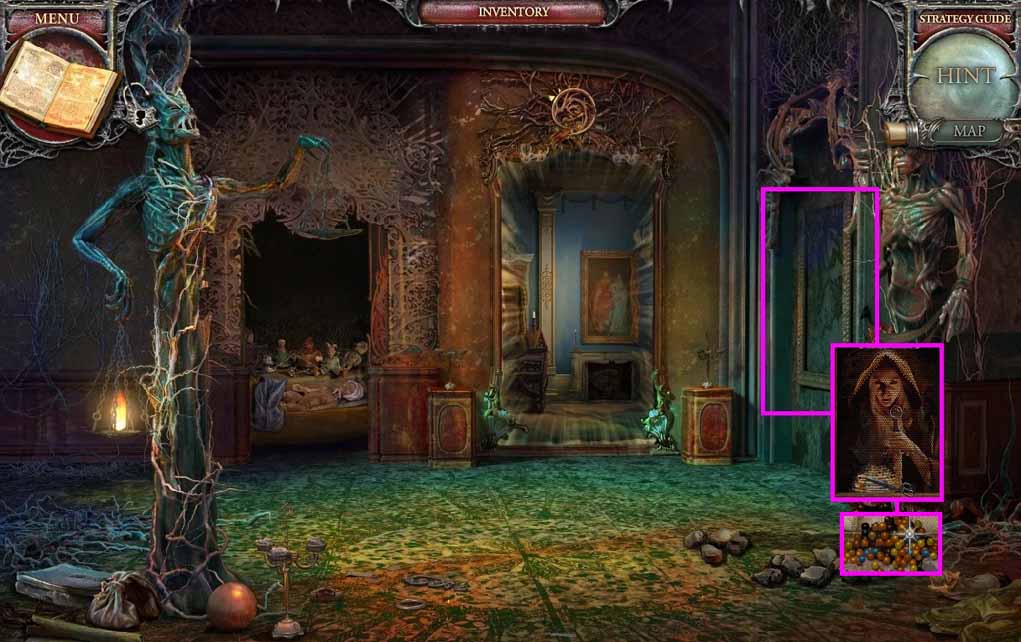
- Move to the Mirror Room.

- Select the candle and ignite it using the lantern; collect the burning candle.
- Use it to clear the cobwebs.
- Examine the alcove; collect the Princess.
- Move to the Drawing Room.
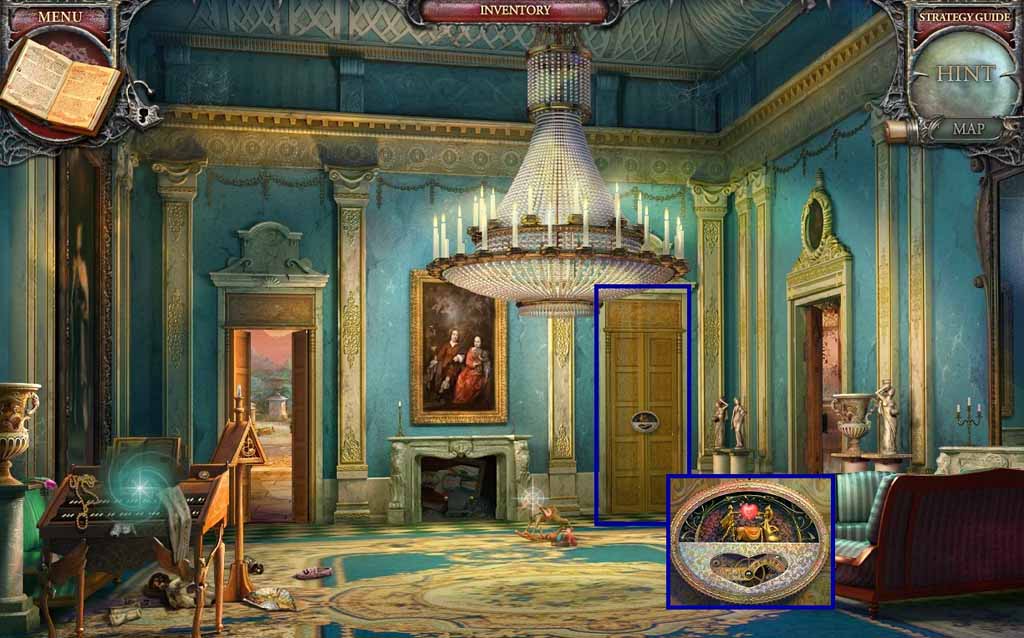
- Examine the door; insert the Princess into the lock.
- Enter the doorway.
- Collect the umbrella.
- Click the doll; collect the glue.
- Examine the side table; collect the flag and the jug.
- Move to the Porch.
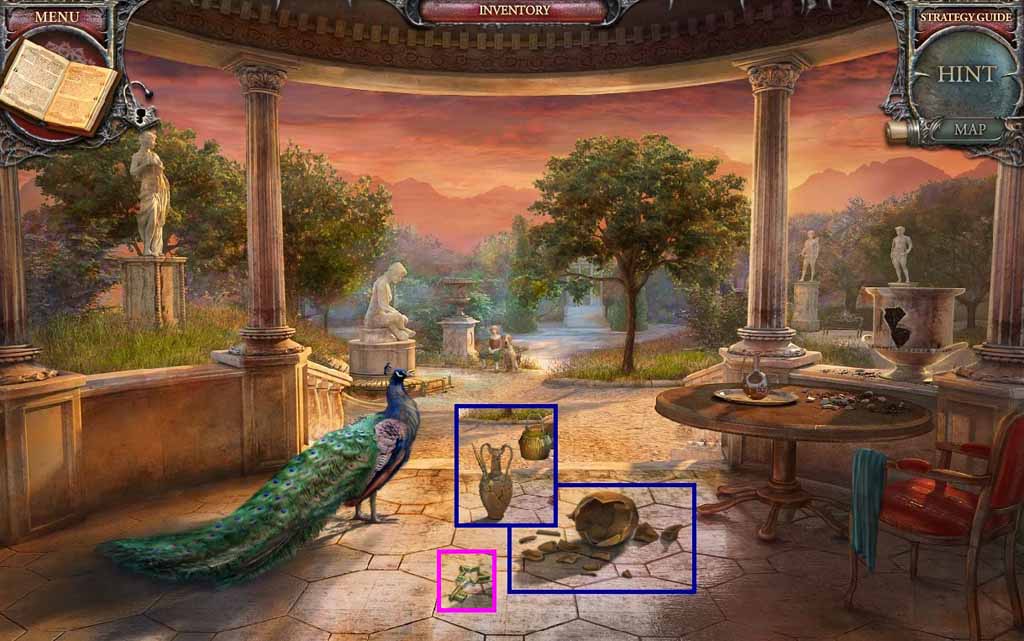
- Select the glue to use on the shards.
- Collect the star-shaped key.
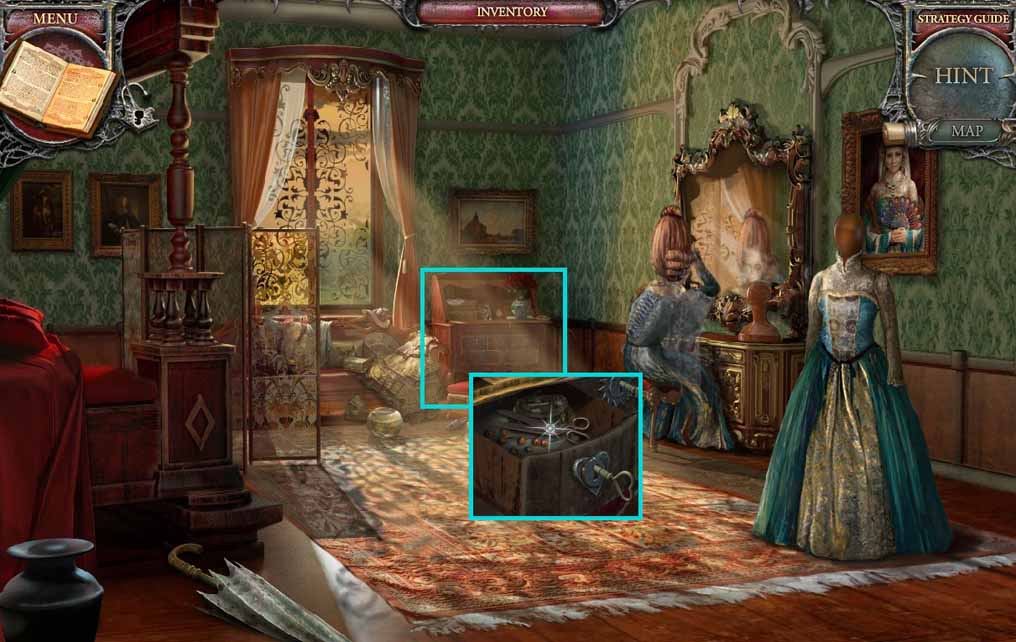
- Move to the Boudoir.
- Click the desk; click the star shaped drawer and insert the star shaped key.
- Read the note and collect the sapling.
- Click the drape.
- Select the umbrella and use it under the bed; collect the rattle part.
- Move to the Nursery.
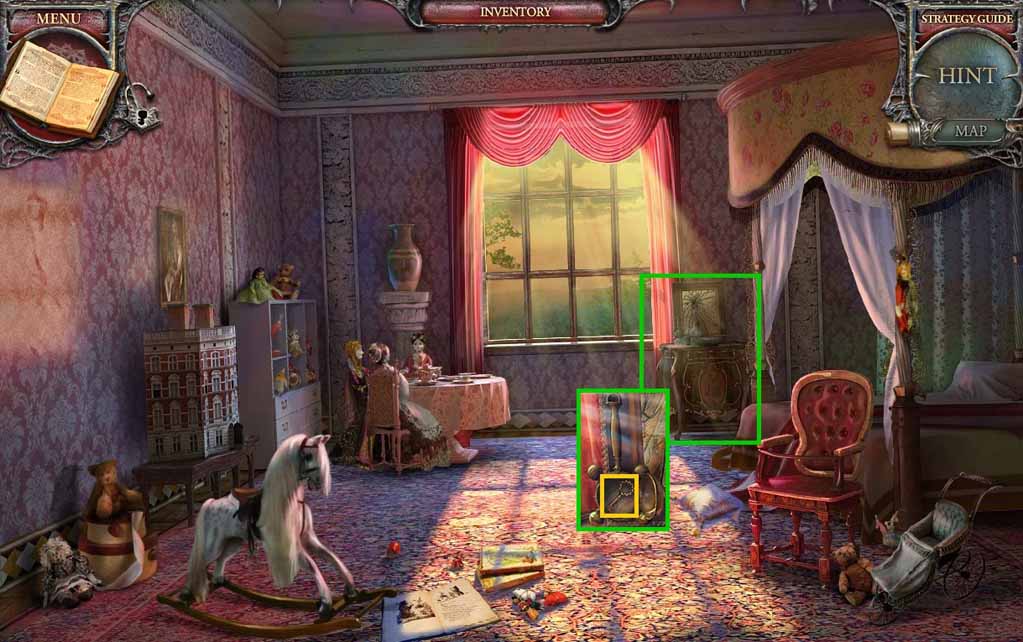
- Examine the side table.
- Place the 3 rattle parts onto the rattle; collect the sun shaped key.
- Move to the Boudoir.
- Examine the desk and insert the sun shaped key into the sun shaped drawer.
- Collect the shield and the brush.
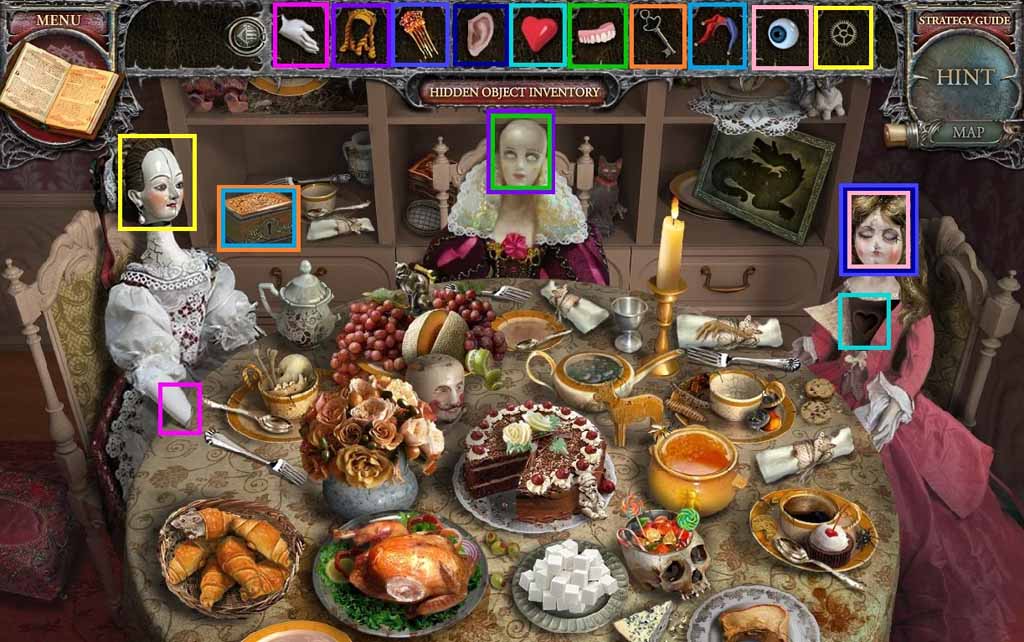
- Click the hidden objects area.
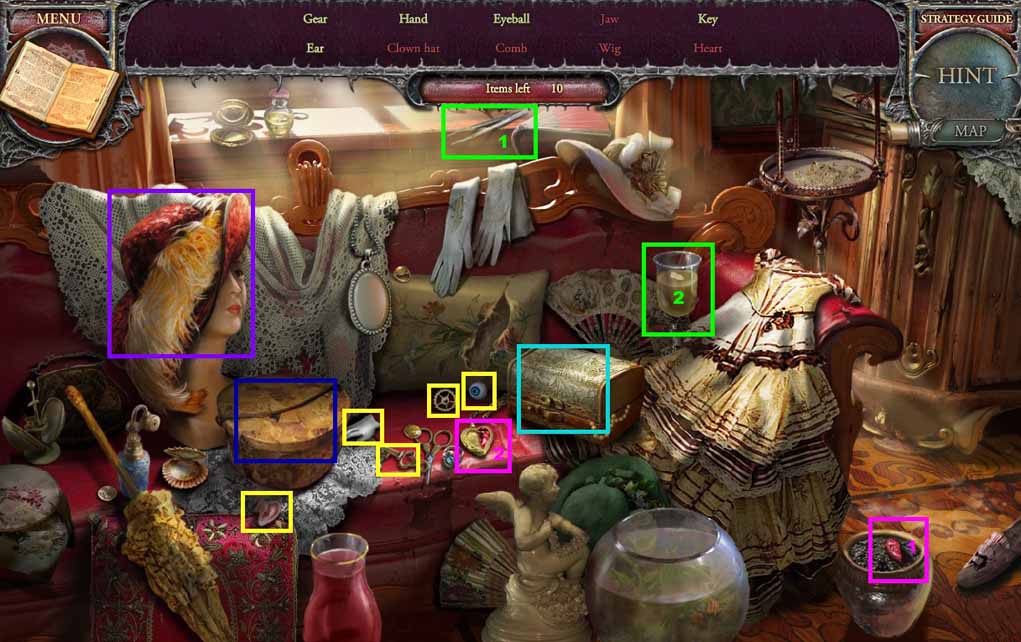
- Find the listed items.
- Click the hat box; collect the clown hat.
- Click the box; collect the comb.
- Click the hat; collect the wig.
- Select the half heart and place it alongside the other half; collect the heart.
- Select the tweezers and place them into the glass; collect the jaw.
- Collect the toy parts.
- Move to the Garden.
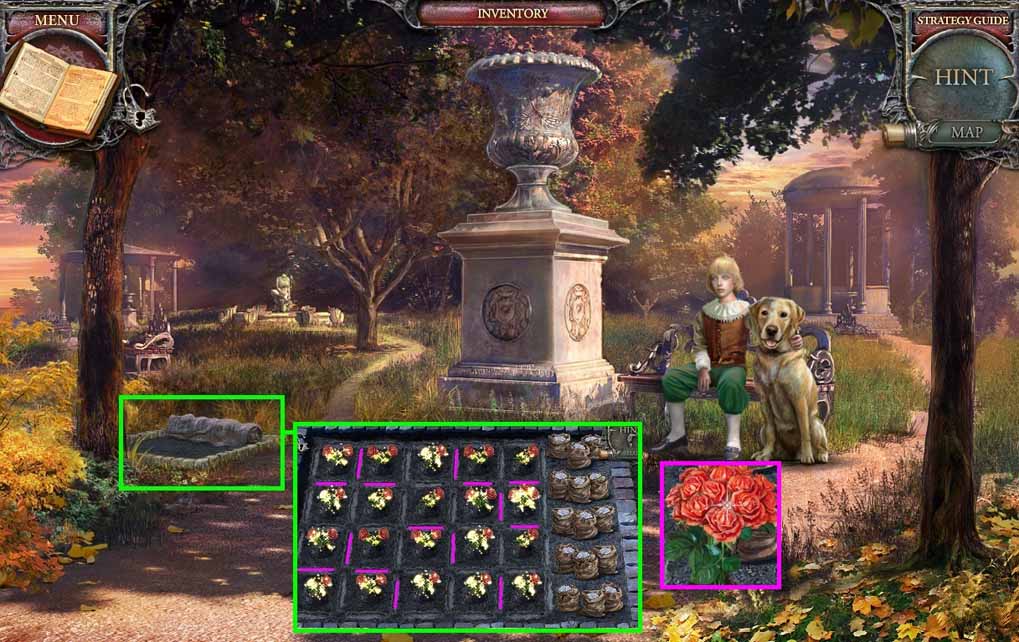
- Examine the flower bed and plant the sapling to trigger a mini-game.
- Solve the game by placing the fertilizer in between the saplings making one flower grow in each square.
- Collect the bouquet.
- Move to the Drawing Room.
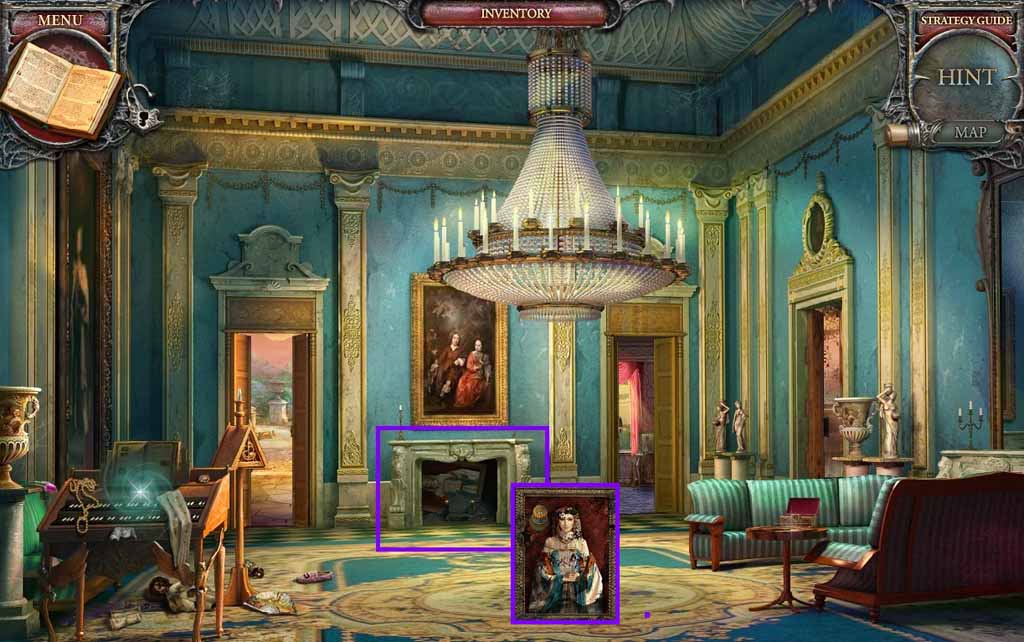
- Click the fireplace; click the painting.
- Click and drag the brush over the painting; collect the Queen’s portrait.
- Move to the Nursery.
- Zoom into the vase and place the bouquet into it.
- Collect the bracelet.
- Examine the table and place the toy parts down to trigger a reverse hidden objects area.
- Place the items where they belong.
- Collect the cane.
- Move to the Garden.
- Give the boy the cane; collect the medallion.
- Move to the Stairs.
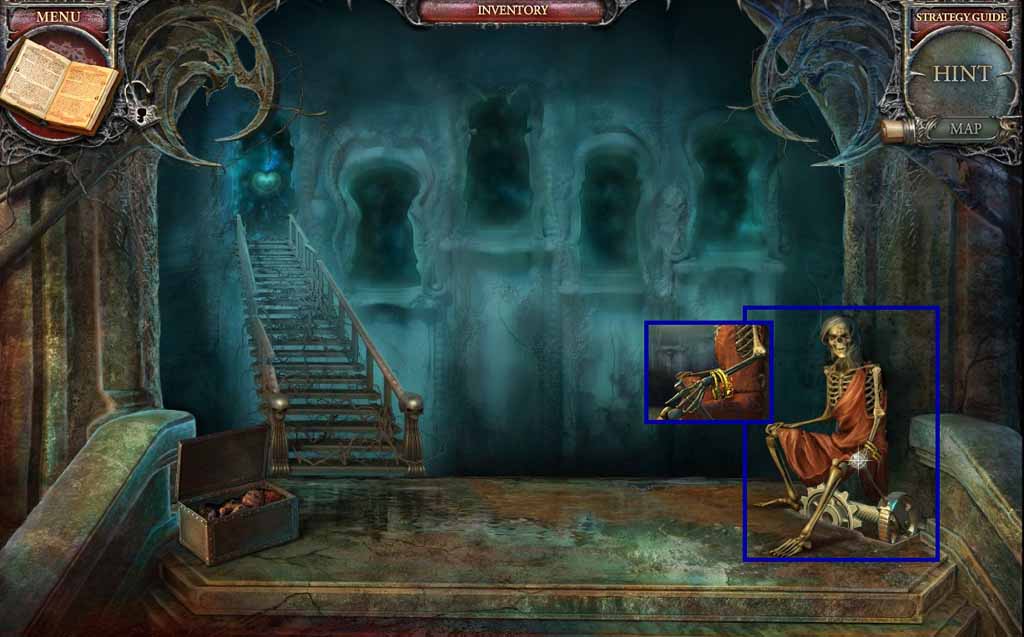
- Examine the skeleton.
- Give him the bracelet.
- Click the stairs and enter the lion doorway.
- Collect the fountain part and the glove.
- Leave through the heart door and go to the Nursery.

- Examine the side table and click the herbs with the glove.
- Collect the tower.
- Move to the Garden.
- Examine the gazebo; place the flag into the tower and the shield above the drawbridge.
- Replace the missing tower and collect the piano key.
- Move to the Drawing Room.
- Click piano and insert the piano key to open it.
- Collect the heart shaped key.
- Move to the Boudoir.
- Examine the desk and insert the heart shaped key into the heart shaped drawer.
- Collect the scissors.
- Move to the Mirror Room.
- Examine the portrait.
- Select the scissors to cut it and collect the beads.
- Move to the Drawing Room.
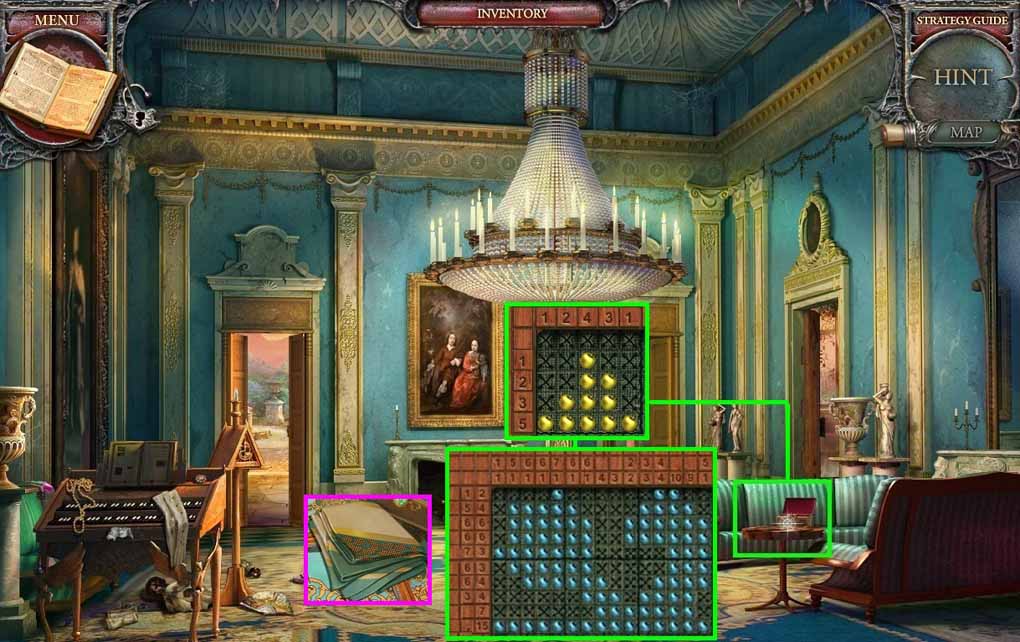
- Examine the table and zoom into the embroidery frame.
- Place the beads onto the frame to trigger a mini-game.
- Solve the game by creating the embroidery.
- Collect the cloak.
- Move to the Boudoir.
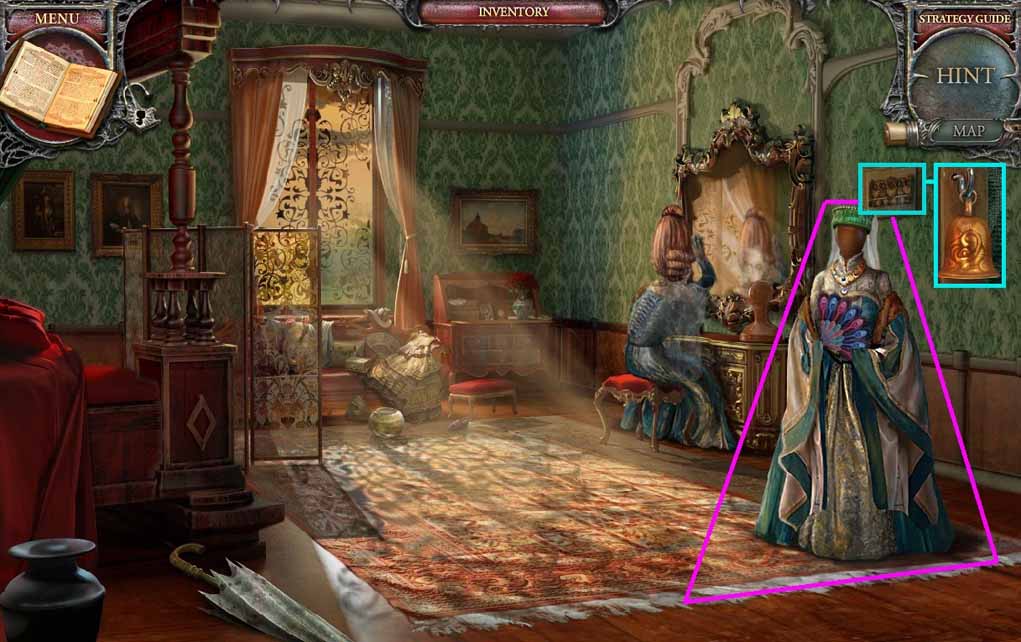
- Place the medallion; hat the fan and the cloak onto the mannequin.
- Examine the safe; collect the doorbell.
- Move to the Nursery.
- Examine the dollhouse; place the doorbell onto the door.
- Collect the safe handle.
- Select the scissors and use them to slice the drapes; collect the tulle.
- Move to the Boudoir.
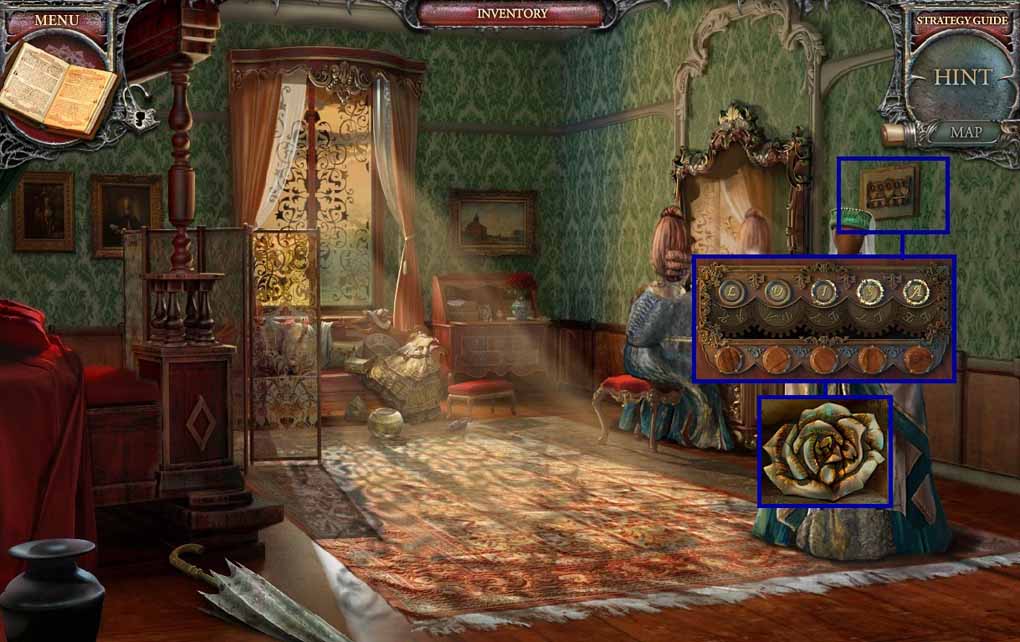
- Examine the safe and attach the safe handle to trigger a mini-game.
- Solve the game by clicking the knobs to spell Luisa.
- Collect the metal rose.
- Move to the Porch.
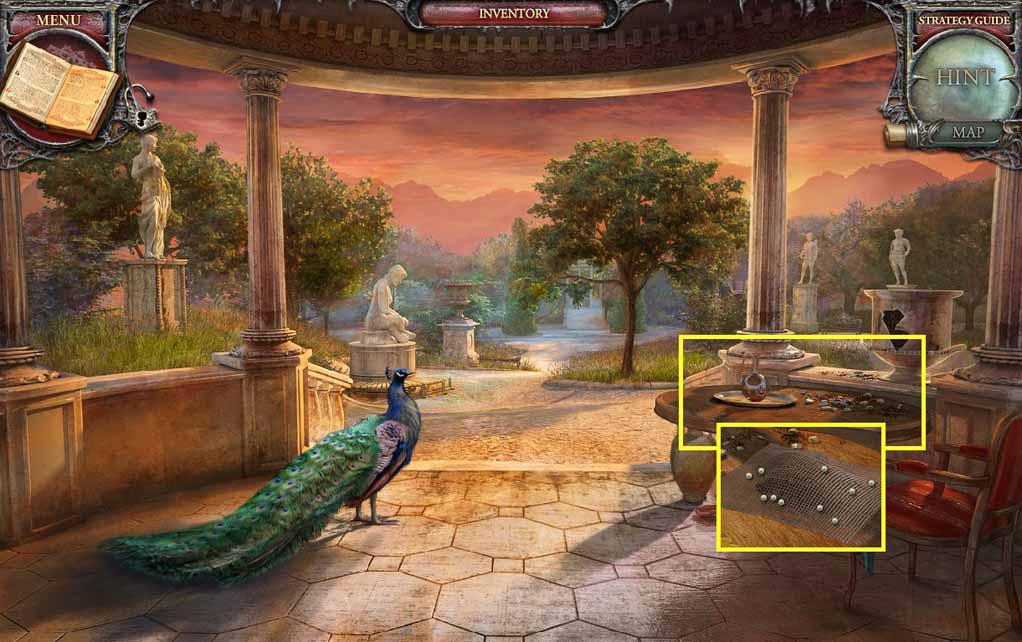
- Examine the table.
- Use the tulle to sift the dirt; collect the pearls.
- Move to the Mirror Room.
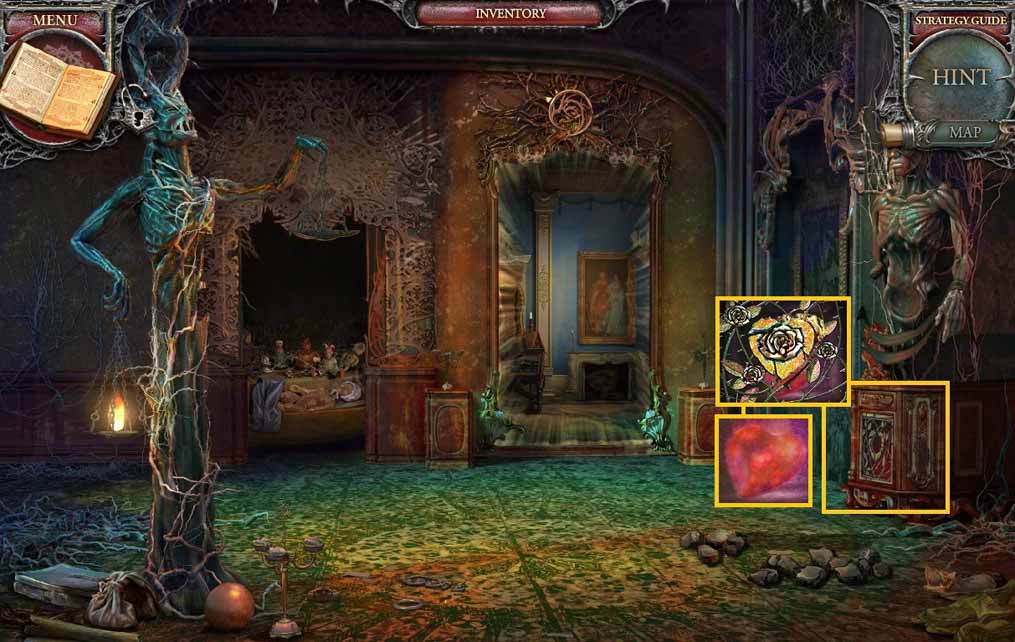
- Examine the base of the statue.
- Insert the metal rose onto the heart; collect the Queen’s virtue.
- Move to the Boudoir.
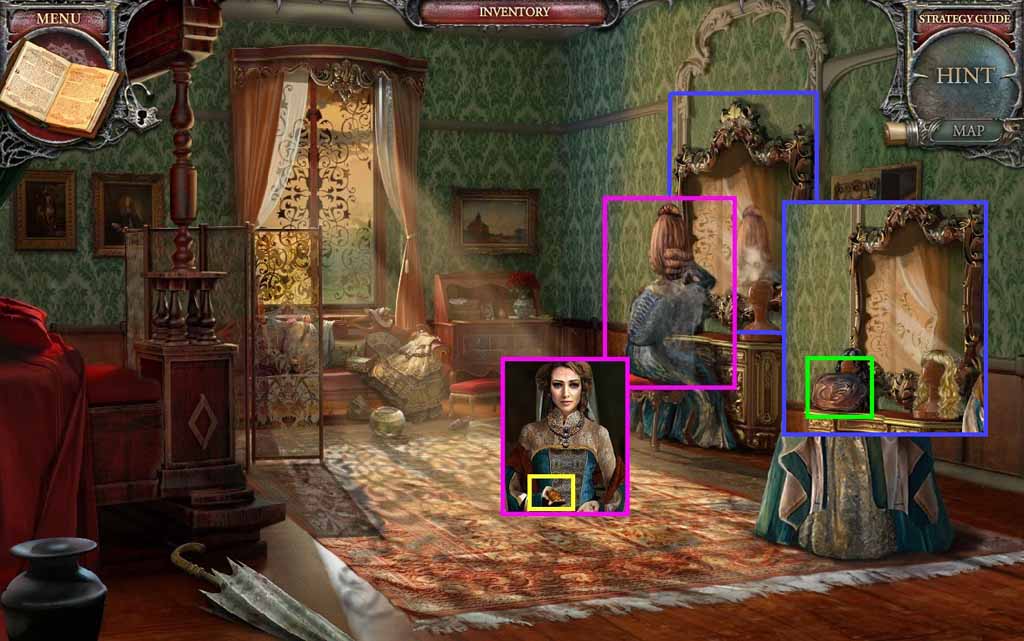
- Give the Queen the Queen’s virtue.
- Collect the book amulet.
- Collect the mirror shard.
- Move to the Book of Spells.
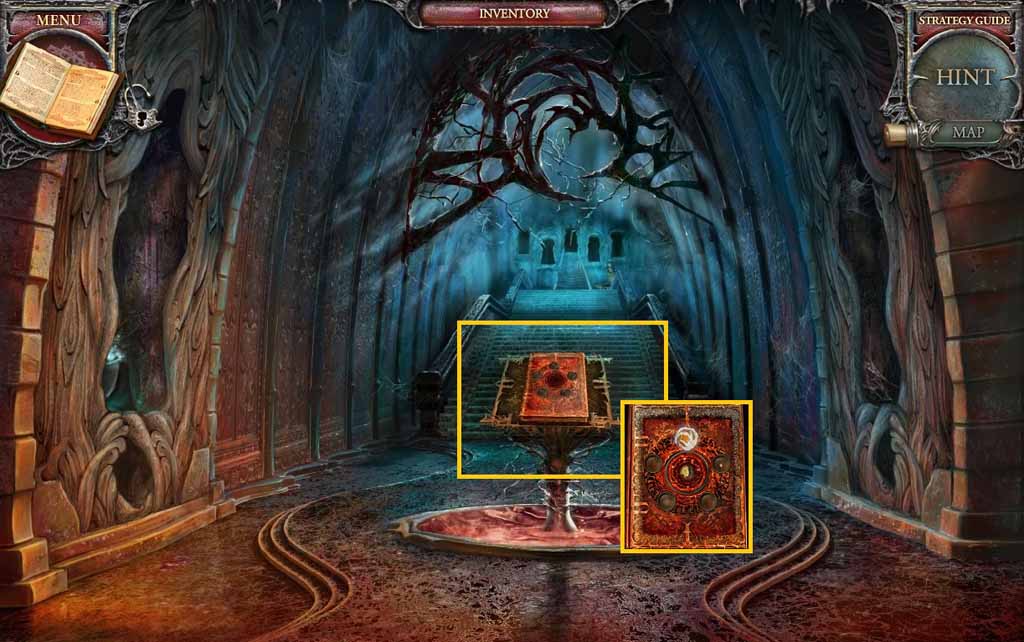
- Examine the book.
- Place the book amulet onto the book.
- Move to the Stairs and enter the Lion doorway.
General Information & Tips
Chapter One: The Queen
Chapter Two: The Knight
Chapter Three: The Artist
Chapter Four: The Scientist
Chapter Five: The Girl
Ask for help in the comments below!
Chapter One: The Queen
Chapter Two: The Knight
Chapter Three: The Artist
Chapter Four: The Scientist
Chapter Five: The Girl
Ask for help in the comments below!